Blog

Memorial Day Looks

I am all about holidays!  There is just something about everyone coming together for a holiday.  Memorial Day is one holiday I always look forward to, not just because it’s a long weekend.  I love how everyone comes together and how we spend the day remembering and honoring those who have been lost serving our great country.  That community, the friendships, the memories, and honoring those who died to keep us safe is such a special and memorable day!

With Memorial Day it always comes with different events to celebrate those lives.  Whether it be a barbecue, a brunch, a formal event, a day at the lake telling stories, or just a small get together with friends.  I find it so important to be together during this holiday and to celebrate the true meaning of the holiday, it is so much more than just hanging out with friends.

We have regularly talked about the armed services with our son, he grasps as much as a five year old can, what a difficult task these men and women are faced with.  He recently told us he wants to join the army when he’s all grown up.  We live close to an Air Force Base and he is always in awe of those men and women.  So this year besides spending time with friends, we will be honoring those lost with a special prayer and lighting a candle in their honor.  Something small but so significant for how grateful we are for them.

Now fashion and what to wear is not the reason to celebrate Memorial Day but I wanted to throw together a couple of fun outfits for those individuals that are going to be attending any events throughout the weekend.  These outfits would also be great for the Fourth of July!   I decided to stick with red and white this year for Memorial Day and put together two outfits, one casual and one that could be dressed up.  At the bottom of this page will be the links to purchase all of the items featured!

First Look:

06561AD1-F1E2-4326-B14D-DCE79C7992AD

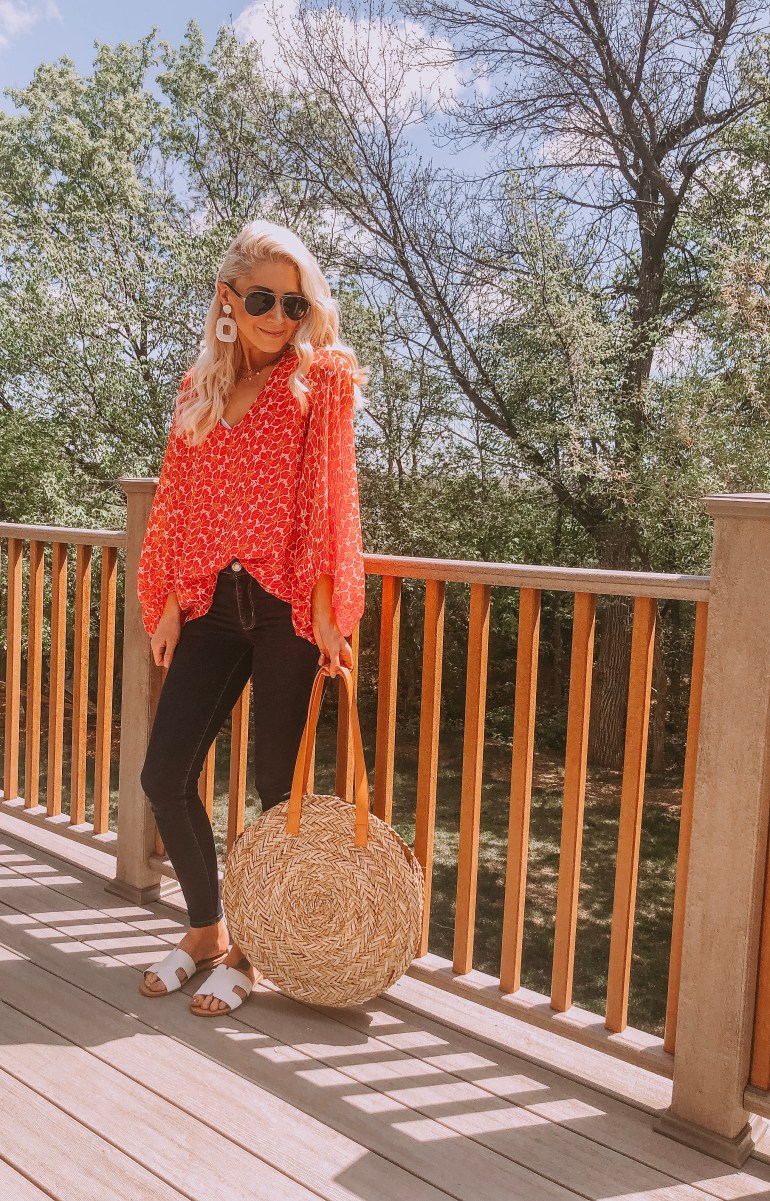
I absolutely love this cute breezy blouse from Vici!  It is lined in the front, and so comfortable for a day at the lake, at a barbecue, or a small get together with friends at home.  I paired it with some high waisted denim from American Eagle, some cute sandals from The Gilded Feather Boutique and of course the bag, from Target, I am currently obsessing over!

Top:

Balloon Sleeve Belladonna Blouse

Denim:

https://www.ae.com/women-the-dream-jean-high-waisted-jegging-deepest-azure/web/s-prod/0433_1174_475?cm=sUS-cUSD

Sandals:

Join The Gilded Feather Boutique on Facebook

Sunglasses:

Runaway

Bag:

https://www.target.com/p/circle-straw-tote-handbag-universal-thread-153-natural/-/A-54002749

Earrings:

All Squared Away Beaded Earrings – Ivory

Second Look:

957C08F4-45E8-45F6-8F3E-82A1D013273E

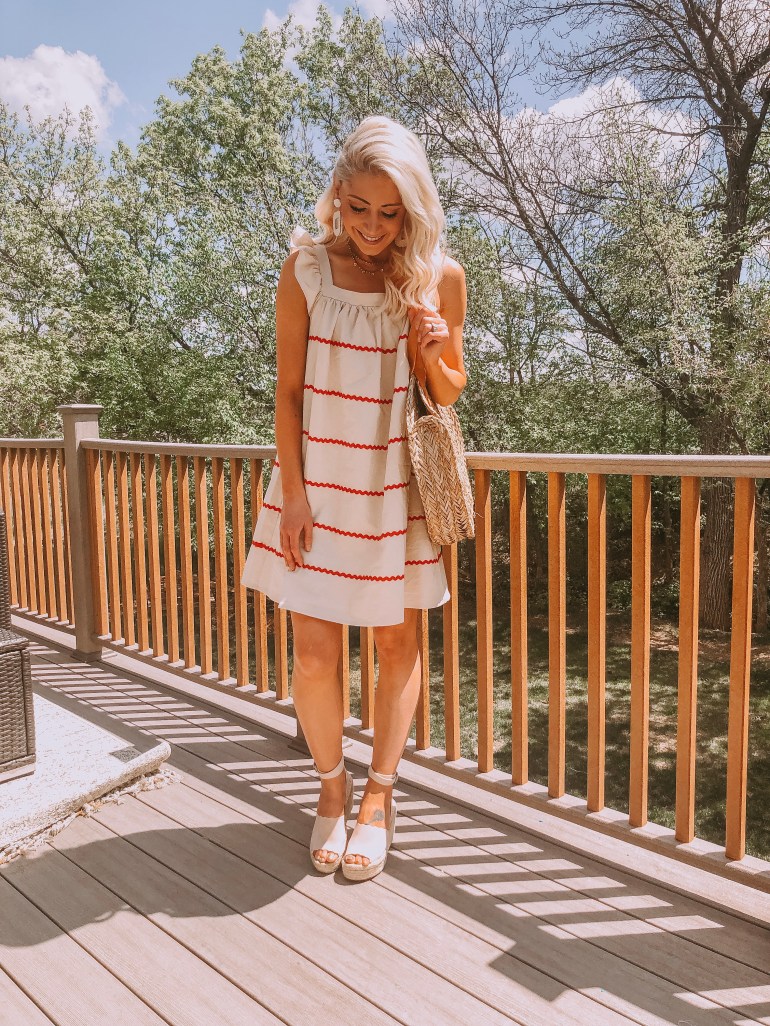
Ok….I am going to brag about this dress.  It’s perfect in every shape and form!  The ruffle details on the sleeve have me swooning and I love how thick the fabric is!  You don’t need a slip, it is breathable, it has pockets, and don’t get me started on those beautiful stripes, it’s my favorite dress of all time!  It’s darling!  Dress it up with some cute scalloped wedges like the ones I’m wearing from Bloom and Flourish Boutique or dress it down with some sandals or white tennis shoes.  Possibilities are endless with this dress!  It is currently sold out, but join the restock waitlist!  It’s worth it I promise!

Dress:

Ricrac + Ruffles Pocketed Dress

Scalloped Wedges:

Blush Scallop Wedges

I hope you all have a fabulous Memorial Day weekend!!  If you also decide to light a candle to honor those lost with us, share it on Instagram and make sure to tag us @copperbush!

xoxo,

Janae


Must Have Basics from Target

I am constantly on the hunt for finding basic wardrobe pieces that transition throughout all of the seasons.  I truly believe finding great basics helps the rest of your wardrobe fall into place! As spring is finally hitting the great state of North Dakota, I have been looking for some new basic T-shirt’s and denim!

I am a sucker for comfy loose fitting T-shirt’s that stand the test of mom life! I’m talking food smears, little hands pulling, and basically exercising throughout the day and still look great!  I love a good basic T-shirt that I can layer throughout the spring and fall months.  I happened to be shopping at Target to get your typical essentials (ok let’s be honest it was for me to roam quietly while my child ate popcorn and I shopped in silence). Before I knew it I had an entire armful of Universal Thread T-shirts (how can you say no to two T-shirt’s for fourteen dollars).  So I snagged a couple of shirts in different sizes and colors and ran home to try them out!

3D654F59-DDE0-4665-8047-0092FBF28FF8

I loved these T-shirt’s so much I actually went back a few days later to snag a couple of more and also decided to try a pair of Universal Thread mid rise jeggings!  I am all for a great T-shirt and a great pair of denim, especially when the prices are such a steal!  I topped the style off with a pair of sandals I picked up at Target on vacation a few months ago and a darling purse (also from Target).  I got this entire look for under $100!

E6665B68-38AC-4F84-8061-A291A00F4BE7

One thing I love about these T-shirt’s is how well they wash up and how comfortable they are!  They will definitely be a staple in my wardrobe! I also bought a couple of the shirts a size bigger than my normal size, so I could knot them, as seen in the photos above.

Below are the links to all of the items in the photos!

T-Shirt (now on sale for $5 each!!!!):

https://www.target.com/p/women-s-camo-print-short-sleeve-v-neck-monterey-pocket-t-shirt-universal-thread-153-green/-/A-54286610

Similar denim:

https://www.target.com/p/women-s-mid-rise-jeggings-universal-thread-153-dark-wash/-/A-53664189?preselect=53571667#lnk=sametab

Purse:

https://www.target.com/p/circle-straw-tote-handbag-universal-thread-153-natural/-/A-54002749

Sandals:

https://www.target.com/p/women-s-annalise-asymmetrical-slide-sandals-shade-shore-153/-/A-53919181?preselect=53833201#lnk=sametab

Hat (similar):

https://www.target.com/p/women-s-faux-leather-band-felt-floppy-hat-a-new-day-153-black/-/A-53532891

Hope you enjoyed this post of my current favorite basic pieces from Target!

Blessings,

Janae

64AA0434-EF01-497F-AF04-3766E8127044

Shiplap Love?


CE1C9835-8B48-47CB-9A81-256EC0EBBE58
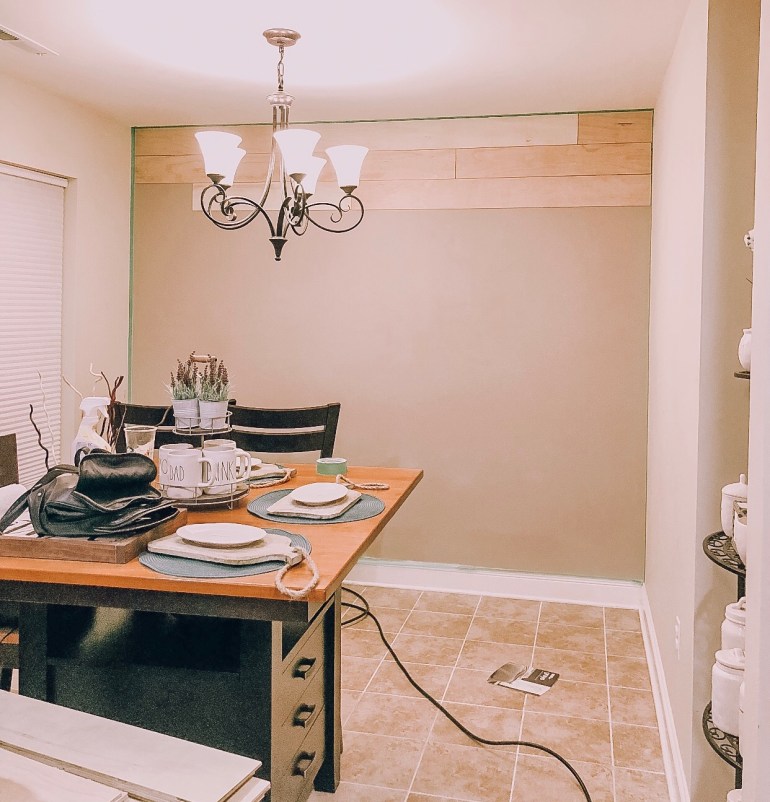
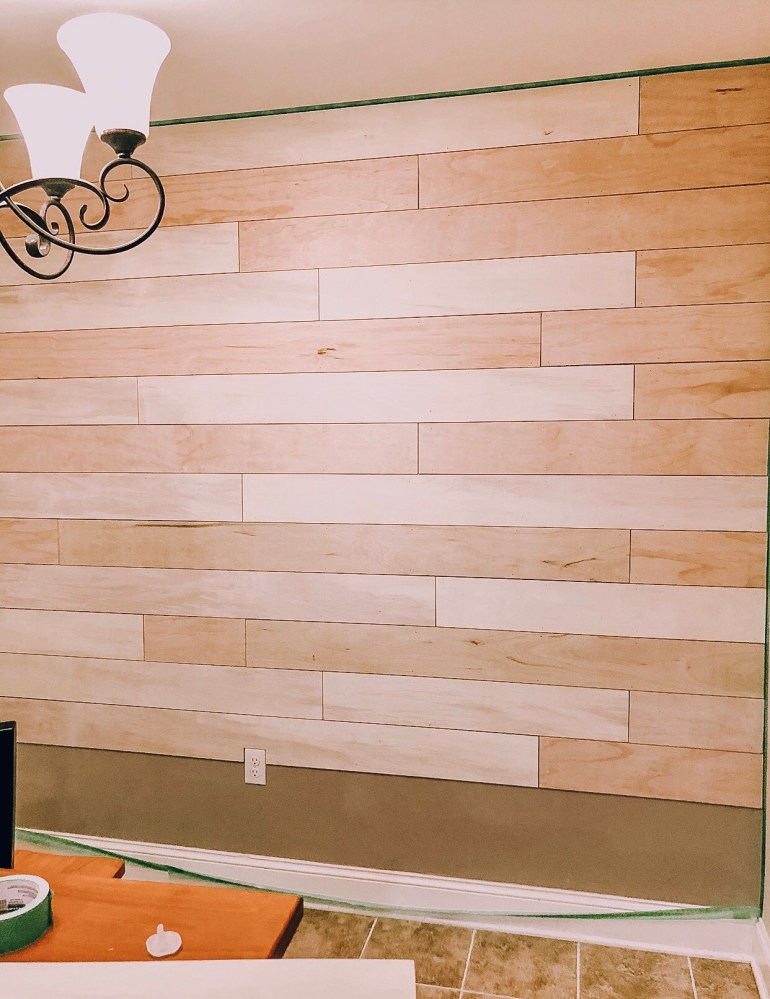
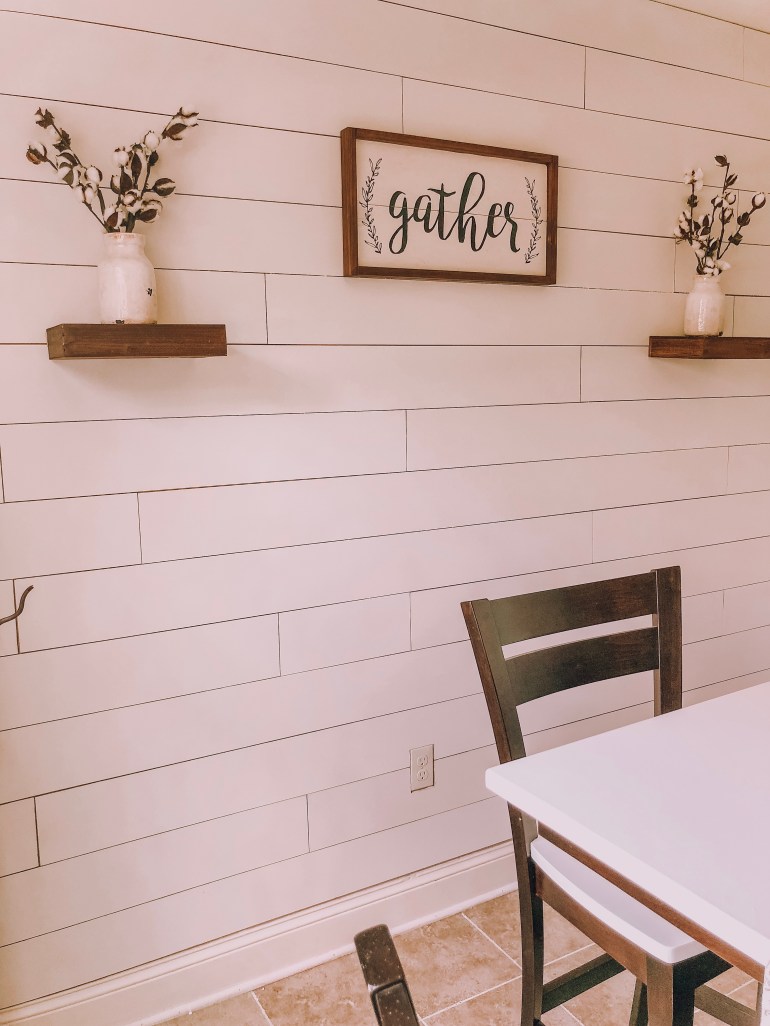
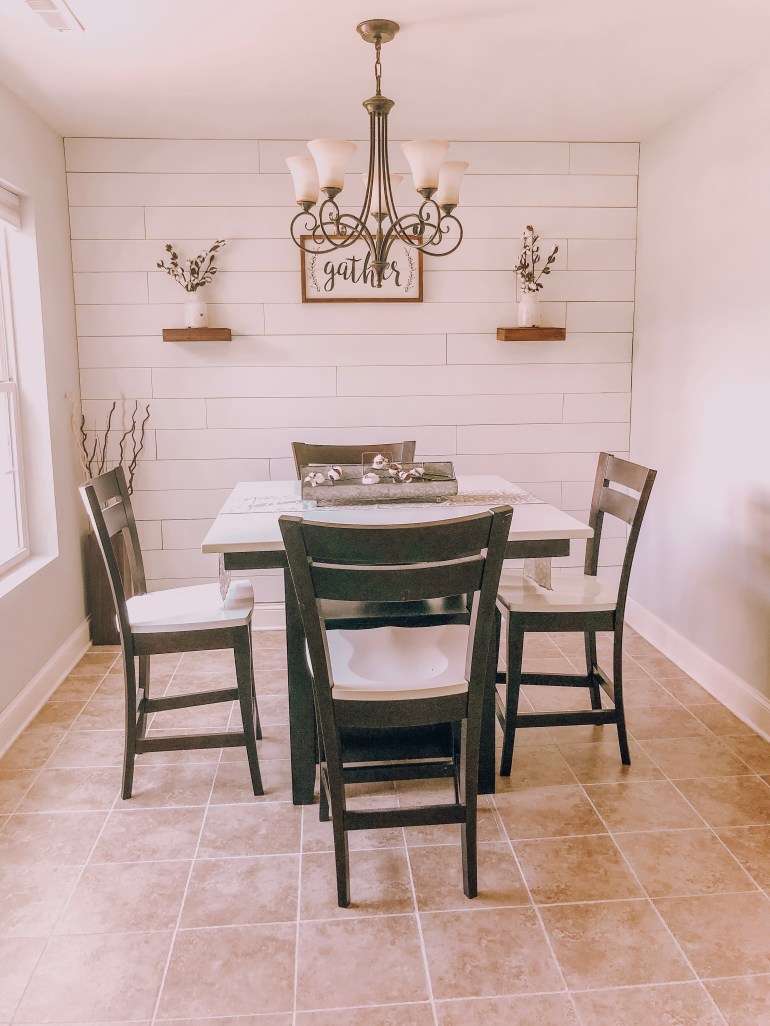
Shiplap…..are you one of those people that love it or hate it?  Or are you just over it?  Truly I could never be over shiplap!  I love it, it can add so much depth to a room, add some texture and it really can transform a space.  I think I fell in love with shiplap in my first house!  You remember that 1897 beauty I keep mentioning!   That house had the cutest shiplap in the enclosed front porch!  Literally swooning remembering those mornings sitting on that porch drinking my morning cup of coffee!!!   My old soul was in absolute heaven!!!

I dreamed of adding some character to this house as soon I walked through it the first time.  The one thing this house lacks is individuality.  Now, I get it, shiplap isn’t really adding individuality because so many homes have a shiplap statement wall.  But I still loved the idea and I knew our dining room needed something for some depth!  So…..you guessed it, shiplap it was!  So we decided to make our own shiplap!  Have you ever looked at the pricing for actual “shiplap,” it is insanely priced!  I can’t remember the pricing off the top of my head but no way were we spending that much!  So I asked my husband if we could just use sanded plywood.  We had used sanded plywood for a few other projects in our home and it worked perfectly!  So we thought we’d give it a go!  I can’t  remember exactly what thickness we went with, but it was the thinnest sanded plywood our store had, I’m guessing a quarter of an inch.

My husband also works a crazy schedule and our full days with him are very limited, so we decided we’d measure everything and just go to Home Depot and have them cut everything for us! Again, we’ve had Home Depot help us with cutting wood before!  It saves so much time, plus they have these carts that look like race cars!  So entertainment for our four year old and we save time and energy having them make our cuts for us, so it’s a total win for everyone!  So after we had all of our wood cut for us at the width and height we wanted, we got home and went for it!

AA67FF90-505F-43F6-ABBD-EC3A04F081D4

We used nickels for spacers and just started laying them out and nailing them in with our nail gun.  We also taped the walls before we started laying the shiplap, that way everything would be ready for painting after we were done.

81ACFA53-7A00-46BD-A3A0-81F260E8DEB4

Once the wall was finished, I used caulk to fill all the nail holes. I let that dry over night and then painted the walls with Behr’s Marquee Matte Finish in Silky White.  That’s it!  Super easy project to get done in a weekend and totally transform a room!

96DCC096-E3EC-46D3-87A7-885994A8E13652C56175-A5F4-42DE-93D4-00BF20B39E94

I hope someone else enjoys this fun shiplap wall as much as I do.  Still swooning over it.

xoxo,

Janae Lee

Kitchen Makeover

B2302246-5183-4AF2-962D-8DBAFA10096F.jpeg

When we bought our house in 2014, it was love.  Really it was, I loved this house the moment I walked into it!  All the could be’s of this house had my mind reeling in all the possibilities!  This house wasn’t finished when we purchased it, and it needed a ton of work to get it up to code before we could even move in.  But we saw endless possibilities of what this house could become!  I knew Cody and I could tackle it and all of its wacky problems and turn it from just a house to a home!  So for the first few months we had to get it up to code and honestly we just wanted to move in!  We had already sold our other home and we were scrambling to get into our new home!  Side note, our first home was amazing!  It was my dream home, an 1897 beauty with so much charm!  I will do a blog post later just to show you all what we did with that house!  I still regret selling it, because it was so charming and held so many memories for me.

Anyways back to our current brand new yet fixer upper!  We finally were able to move in literally on Christmas Day in 2014!  We ate Christmas dinner on carboard boxes and it is to date one of my fondest Christmas memories!  We were so excited to finally be in our home!  Even though the house was a new build,  there were still things we wanted to change to make it more us!  We also couldn’t afford to do all the changes we wanted to right away!  This was a killer for me!  I have the patience of a two year old!  When we bought this house we were in the thick of adopting our son from Bulgaria!  Those of you that know anything about international adoption, know it’s not cheap!  We were pinching pennies to get our angel home!  So three and a half years later it’s finally time to update this house and really make it a home!  Thank goodness!

So the first thing we wanted to do, ok wait, the first thing I wanted to do was make some quick changes to the kitchen!  I personally have always wanted a bright white kitchen!  There’s just something about a white kitchen that screams to me!  So we decided to do some quick changes to our cute kitchen first.

The first thing we did was add some wainscoting and trim to our island.  I wanted to add some texture and depth to the kitchen and this was exactly what it needed!  Then I went ahead and painted all the cabinets and island in a very long grueling process!  Now that I am finished, hallelujah, it was 100% worth all the time and patience.  Remember, I have the patience of a two year old, and these cabinets surely felt like they would be the death of me!  But I promise if you decide to refinish your cabinets and go about it the right way, it is so worth the time and effort!  So here’s what we did!  I will lay it out step by step and list the supplies I used!

Supplies:

Degreaser

Sand Paper in 220 Grit

Primer

Painters Tape

Cabinet Rollers

Trim Brush

Behr Ankyl Semi-gloss Enamel Paint

1.) The first thing I did was use a degreaser to clean all the cabinets thoroughly!  I just went to Home Depot and asked them what they recommended and this is what they told me to use!  We also got it in the painting section.


https://www.homedepot.com/p/Krud-Kutter-32-oz-Kitchen-Degreaser-Spray-305373/301476517

2.)  Then I removed all the hardware, hinges and drawer fronts on the drawers.  I also labeled everything so I knew exactly where it needed to go when it was time to put the kitchen back together.  This helped significantly at the end of the project!  After everything was cleaned and all of the hardware was removed I lightly sanded everything!  Then used a dust cloth to wipe everything down.

3.) Then I primed everything!  I used Killz primer.  I did two coats and sanded everything in between each coat and then I let them cure for about 48 hours.  I also allowed 24 hours of dry time between each coat.  Again worst thing ever for someone who lacks any form of patience!

https://www.homedepot.com/p/KILZ-Original-1-gal-White-Low-VOC-Oil-Based-Interior-Primer-Sealer-and-Stain-Blocker-10936/100131137

4.) After the primer had cured I then got down to business with our actual paint! I went with Behr’s Alkyd Semi-gloss Enamel Paint in Glacial Mist.  Again I did two coats of this paint, allowed 24 hours of dry time between coats and sanded very very lightly between coats!  Also make sure to use a dust cloth to wipe down before you paint!  And that’s it!  Then it was time to put the kitchen back together again!  I also used a cabinetry roller (I believe I used a 4 inch roller) and a trim paint brush.  Both of these you can just find in your painting section at any hardware store!

6CA9E6BB-ABC9-45F8-8076-E5EF988CFB64

As of right now I can’t think of anything I would’ve done differently!  But I will make another post in six months or so to let you all know how they’ve held up!  But so far so good!!!!  It did take me forever to complete this project.  But I also have a toddler at home with me, and my husband was out of town the entire time I worked on this project.  So if you had more than one person and someone to watch your kids it could be done quicker!  This project took me roughly 21 days to complete!  I did do it in sections though which took longer!  I started with the island, finished the island, then moved to my lower cabinets and then finally finished our upper cabinets!  All I can say is don’t skip your prep work!  It’s time consuming but worth it!  Overall I’m very happy!  I’ll share more photos once our flooring is installed and we decide on a backsplash (this may never happen, I change my mind about back splash more often than I change my clothes).   This project was a great way to save some money and totally change the look of your kitchen!

B070F134-D6D3-4F6F-B9AA-B042BD1EAD84

D3F87E19-79A0-4212-9A2D-447D1DFFEEB7


Xoxo-

Janae Lee